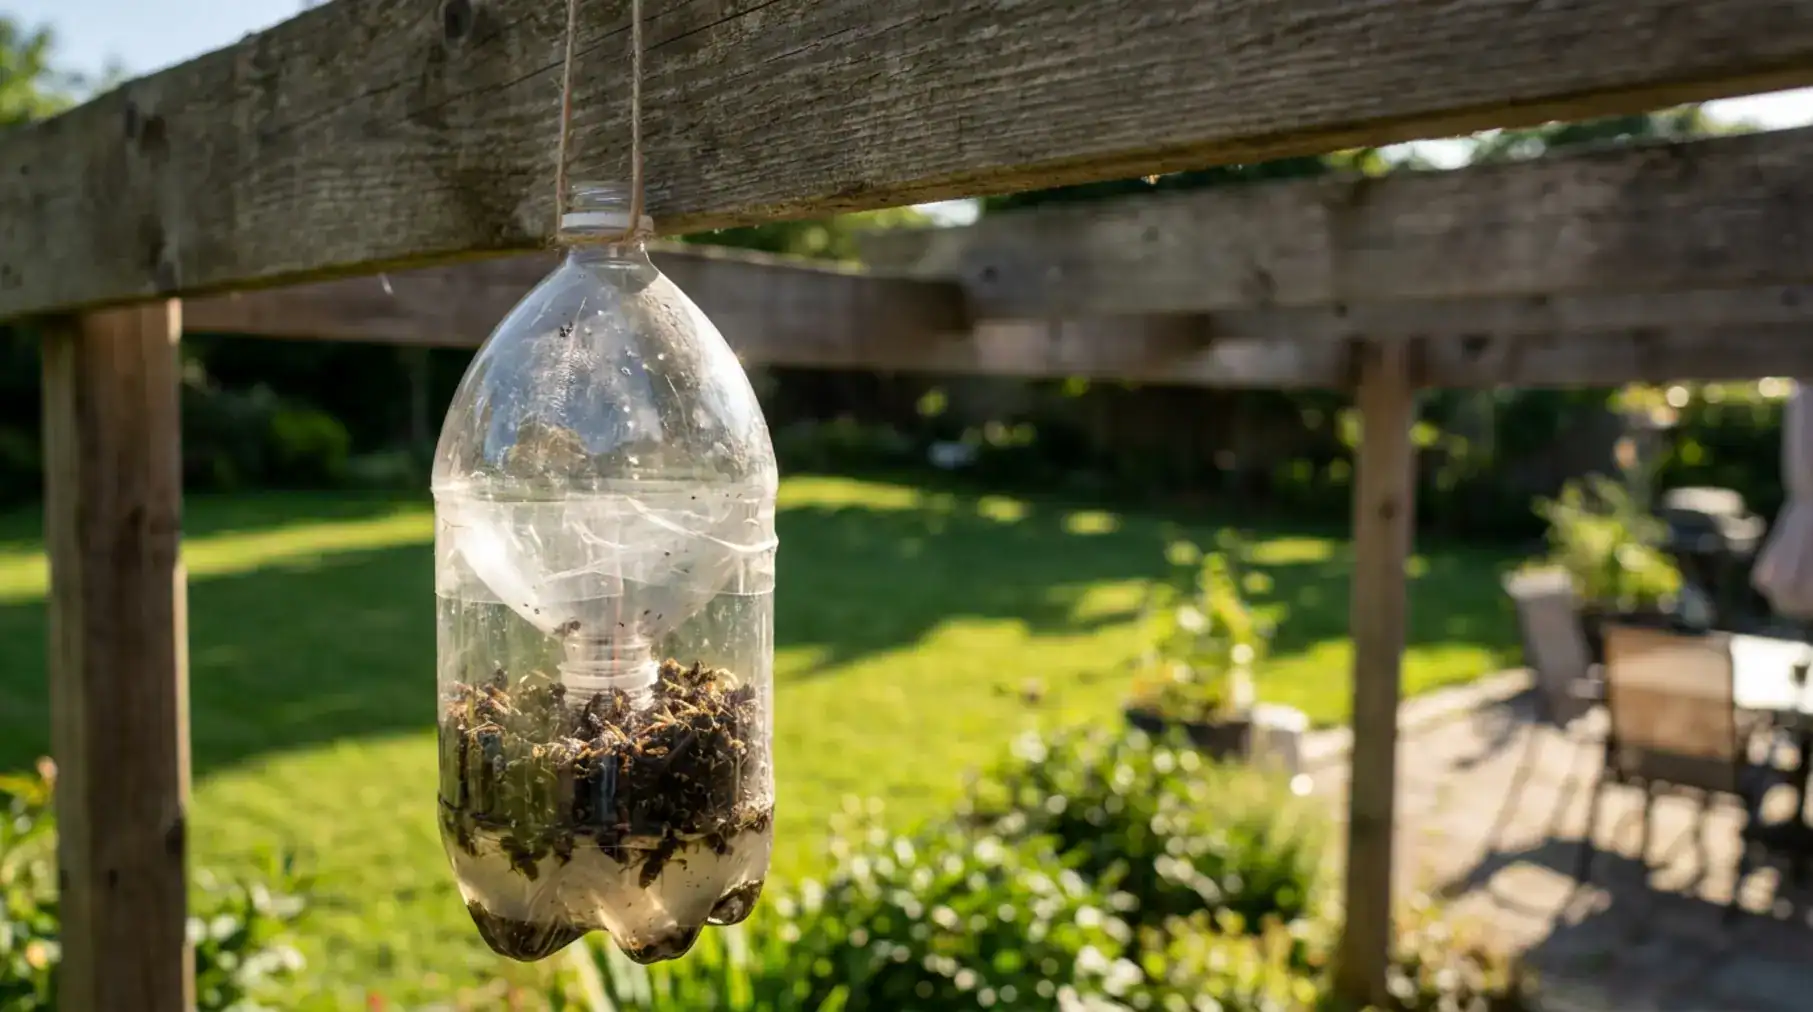
In just 36 hours, a simple $0.10 homemade bottle rig caught 47 wasps, completely outperforming expensive store brands. If sudden swarms are ruining your backyard barbecues, you need a fast, reliable diy wasp trap. Late summer heat shifts their biology, turning these annoying pests into aggressive sugar scavengers.
How do you make a DIY wasp trap?
To make a DIY wasp trap, cut the top third off a clear 2-liter plastic bottle just below the curved neck. Invert the top and insert it into the base like a funnel. Seal the edges with clear tape, add seasonal bait with a few drops of dish soap, and hang it 20 feet away from seating areas.
Why Homemade Wasp Traps Beat Store-Bought Alternatives
Building your own plastic bottle insect trap costs pennies and often yields a much higher catch rate than commercial units. You do not need to spend twenty dollars to reclaim your backyard.
Start by looking at the hard data. Commercial traps retail for $15 to $25 per pair. Conversely, building a trap from recycling bin materials costs under $0.50 for tape and bait. Cost-effective pest control solutions allow you to deploy multiple traps across a large yard without draining your wallet. Furthermore, DIY wasp traps work better than store-bought options because you can customize the bait instantly. . If one recipe fails, you simply pour it out and try another.
According to industry experts, homemade insect traps achieve a 40-70% fill rate in just 48 hours. They rely on a simple inverted funnel design. Insects crawl down the slick plastic neck to reach the sweet liquid below. Because wasps are not biologically wired to fly straight up, they cannot navigate back through the small hole. This creates an environmental wasp trap solution without spraying harsh toxic aerosols around your children or pets.
Understanding Wasp Behavior and Seasonal Diet Shifts
Wasps change their diet from protein in the spring to sugar in the fall, which completely dictates how you bait your traps. Using the wrong bait for the wrong month guarantees failure.
In early spring, yellowjackets and hornets act as carnivores. They require dense protein to feed their growing larvae back at the nest. Consequently, a sweet sugar trap set out in May will sit empty. Late summer changes everything. Around August, the queen stops laying eggs. Worker wasps suddenly crave carbohydrates for energy. They transform into aggressive sugar scavengers. This biological shift explains why yellowjackets constantly crash your late-summer picnics.
Catching queens early stops entire colonies from forming. . Therefore, tracking seasonal trends in wasp activity and trapping is vital. By understanding these life cycles, you stay one step ahead of the swarm.
“Catching just one queen wasp in April prevents a colony of 1,000 workers by September. Timing is absolutely everything.”
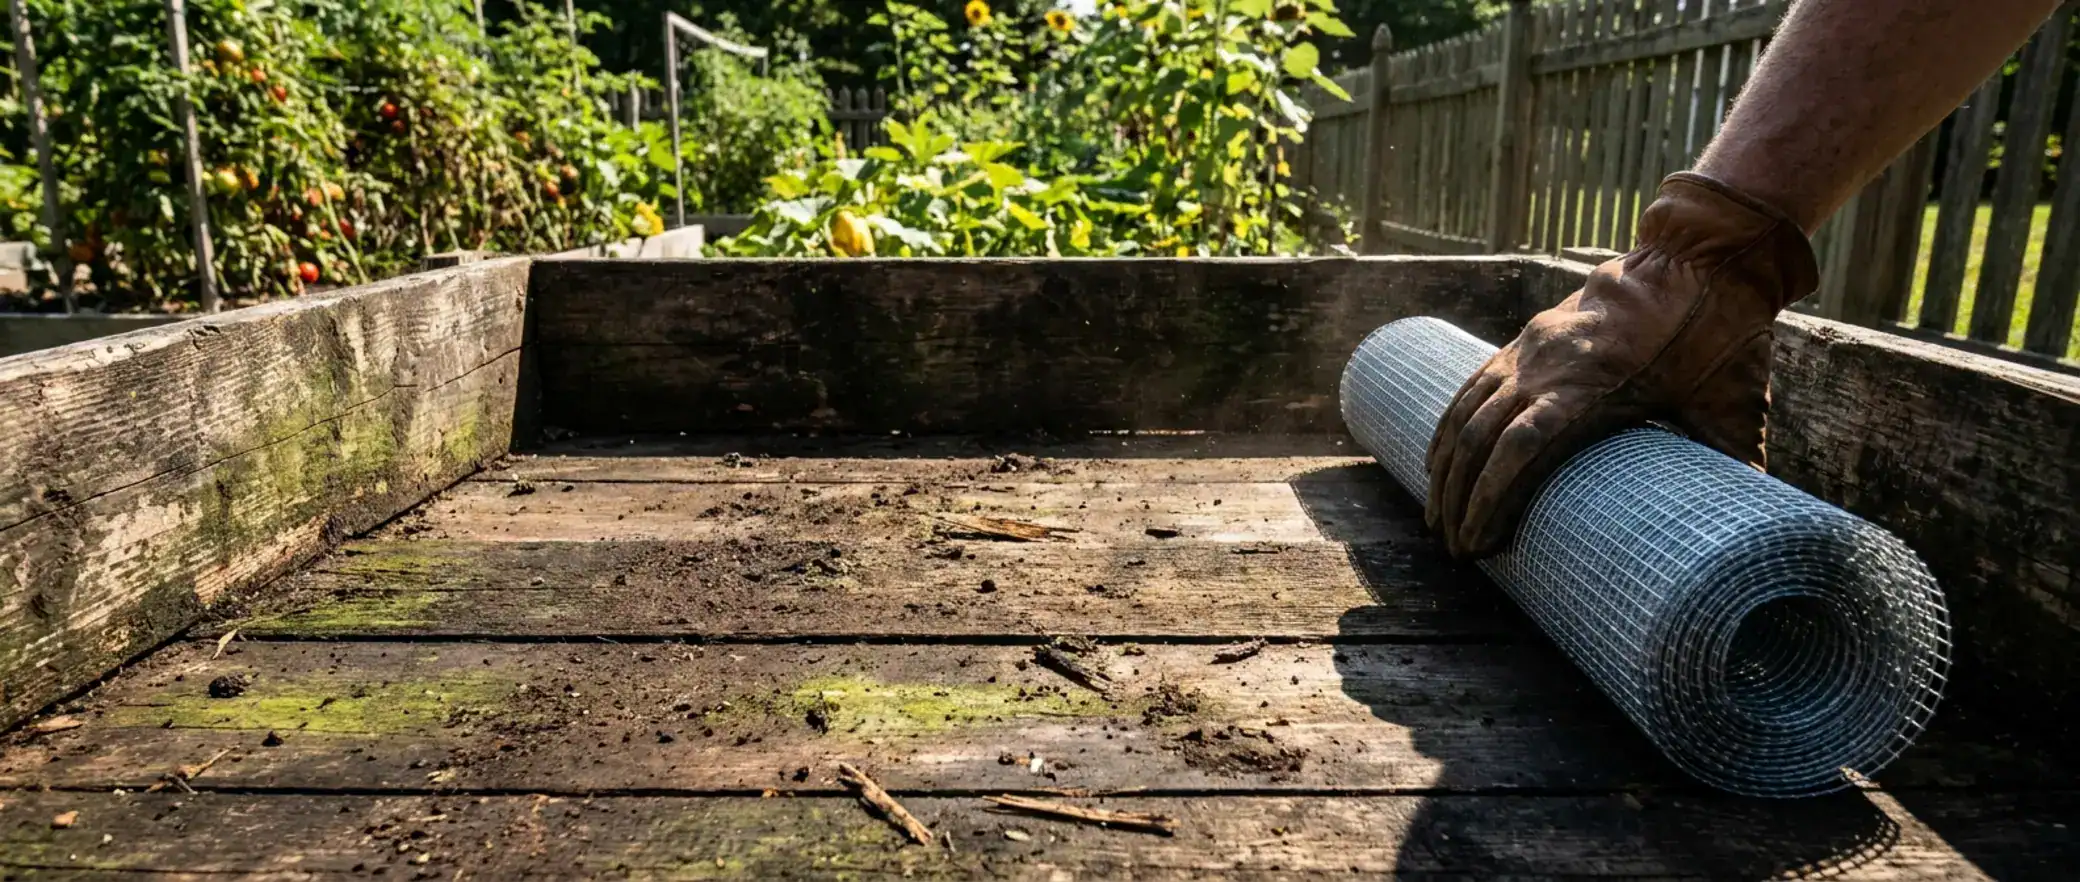
Materials Needed to Make a Wasp Trap
Gathering the right household materials ensures you can construct a highly effective trap in under five minutes. You likely have everything you need sitting in your kitchen right now.
You must avoid opaque containers like milk cartons. You must be able to visually check the liquid level and confirm the insects are dead before opening the device. A standard clear soda bottle is universally the best choice. Here are the specific materials needed to make a wasp trap.
| Material Item | Purpose and Specification |
|---|---|
| Clear 2-liter plastic bottle | Acts as the transparent main body and funnel. |
| Sharp scissors or box cutter | Used to cleanly slice the plastic curves. |
| Clear packing tape | Seals the outer edges without blocking visibility. |
| Twine or wire hanger (30 cm) | Suspends the trap safely in the air. |
| Liquid dish soap | Breaks water surface tension to drown insects. |
Step-by-Step Instructions: How to Make a Plastic Bottle Wasp Trap
Following a precise construction sequence guarantees your trap prevents wasps from escaping once they enter. These easy wasp trap instructions take exactly five minutes from start to finish.
Safety Note: Always cut away from your body when slicing thick plastic bottles. .
- Remove the outer label from the bottle completely so you can monitor the trap visually without obstructions.
- Cut the plastic bottle exactly where the curved top flattens into the straight cylindrical body.
- Invert the cut top piece and push it down inside the bottom half to form a funnel.
- Seal the outer seam tightly using clear packing tape to prevent sneaky insects from escaping through the cracks.
- Punch two small holes on opposite sides near the top rim for your hanging string.
- Thread a 30 cm piece of twine through the holes and tie a secure double knot.
- Coat the inside of the funnel neck lightly with olive oil to remove traction.
- Pour 3 to 5 cm of liquid bait directly into the bottom chamber.
Think of it like a lobster trap. It is incredibly easy to enter, but geometrically impossible to exit. If the entry hole is larger than 1cm, you will experience a high escape rate. How do you make a simple wasp trap work better? Just tape over the funnel hole slightly to narrow the opening.
The Best DIY Wasp Bait Recipes and Seasonal Strategy
Matching your bait to the specific season is the absolute secret to maximizing your catch rate. An empty trap is almost always the result of bad bait.
Use warm water to dissolve sugar rapidly. Always let the mixture cool completely before adding your soap. If you add soap to hot water, it foams up and ruins the trap.
- Spring Bait (April to June): Use raw hamburger, tuna juice, or wet cat food mixed with water. Do not use sugar during this timeframe.
- Late Summer Bait (July to October): Mix 5 to 7 spoons of white sugar per liter of water. Jam and apple juice also work exceptionally well.
- The Soap Rule: Add exactly one teaspoon of dish soap per cup of liquid. Soap destroys the water’s surface tension. Wasps breathe through spiracles on their bodies. Without surface tension, they sink and drown instantly.
- The Bee Hack: Add one tablespoon of apple cider vinegar to your sugar bait. This natural repellent keeps beneficial honeybees away while strongly attracting yellowjackets.
Choosing the right liquid creates a sustainable and eco-friendly pest management system. You dictate exactly what you catch. The benefits of using natural baits over chemical ones include keeping your local garden pollinators safe.
Placement and Maintenance: Where to Hang Your Trap
Hanging your traps in the correct location draws wasps away from human activity and drastically increases capture efficiency. Location makes all the difference between a ruined BBQ and a peaceful afternoon.
Never hang a plastic bottle wasp trap right over your patio table. These devices attract pests. Hanging them near your food brings danger directly to your guests. Instead, hang traps 20 to 30 feet away from human seating areas. This draws the swarm outward to the perimeter of your yard.
Suspend the bottle 3 to 10 feet off the ground. This height directly intercepts their natural foraging flight paths. In extreme heat, place the trap in the shade to slow down bait fermentation. In cooler temperatures, hang it in direct sunlight to boost insect activity. How long to catch wasps in a trap? You should see significant results within 24 to 48 hours. Using natural wasp repellents for traps around your immediate patio while placing the bait far away creates a perfect defense perimeter.
Troubleshooting Ineffective DIY Wasp Traps
Identifying common setup mistakes quickly restores your trap’s ability to catch and hold insects. Even the best designs occasionally fail due to weather or bait age.
When troubleshooting ineffective DIY wasp traps, you must first look at the liquid. Dead insects stack up rapidly over time. Eventually, they form a solid floating raft. Fresh arrivals land on the dead bodies, drink the bait safely, and easily fly away. You must empty the container every three to five days to prevent this raft effect.
| Problem Detected | Immediate Solution |
|---|---|
| Trap is completely empty in May | Switch from sugar bait to protein bait. |
| Insects fly right out of the top | Smear petroleum jelly inside the funnel neck. |
| Honeybees are accidentally dying | Add apple cider vinegar to repel them. |
| Ants are invading the trap base | Clean sticky spills off the outside bottle surface. |
Common mistakes when making a wasp trap also involve tape choice. Do not use duct tape. Duct tape blocks your view, making it dangerous to check if the insects inside are dead or alive.
Safety Tips and Eco-Friendly Disposal Methods
Safely disposing of trapped pests prevents painful stings and stops alarm pheromones from triggering secondary swarm attacks. Handling a container full of live, angry stinging insects requires extreme caution.
Safety Note: Only perform maintenance on your traps in the early morning or late evening when temperatures are cold and pests are lethargic. .
How do you dispose of wasps caught in a trap safely? The absolute safest method is freezing. Seal the entire trap tightly inside a plastic grocery bag. Place it in a deep freezer for two hours. This kills the remaining survivors safely without chemicals. Alternatively, submerge the entire rig in a bucket of soapy water for thirty minutes.
Never crush dead insects near your house. Crushed bodies release chemical alarm pheromones. These airborne signals summon the rest of the hive to attack. . Review safety tips when using DIY traps before handling any active setup. Clean the bottle thoroughly with hot soapy water before refilling it to remove old rotting smells.
Enhancements and Pro Tips for DIY Pest Projects
Upgrading your basic bottle with visual tricks and essential oils dramatically boosts your overall pest control success. A little ingenuity transforms a simple bottle into a professional-grade catcher.
The USDA discovered an incredible trick. Painting the top funnel portion of a trap matte black increases catch rates sixfold. . Yellowjackets perceive the dark top as a shaded, inviting nest entrance. This simple visual trick elevates ordinary simple wasp trap designs to expert levels.
If you want unique eco-friendly wasp trap ideas, combine your trap strategy with natural yard barriers. Spray a defense perimeter using essential oils. Mix ten drops of clove, geranium, and lemongrass oil into a spray bottle. Use a plastic bottle for a wasp trap at the far edge of the yard, and spray the oils directly on your deck.
This push-pull method defines successful wasp repellent DIY strategies. You can also experiment with 3D-printed funnel inserts. These small plastic nozzles fit perfectly into a standard milk jug, eliminating the need for cutting entirely. Integrating these methods improves your overall wasp control DIY projects.
Comparison of Homemade vs Commercial Wasp Traps
Evaluating cost, effectiveness, and environmental impact shows exactly why household traps often outperform store-bought pest management devices. You might assume commercial brands hold a secret advantage, but the data says otherwise.
Are homemade wasp traps effective compared to commercial brands? The evidence heavily favors the homemade approach for residential issues. Store-bought traps from brands like Terro or Rescue! cost significantly more per unit. They often rely on single-use plastic designs that inevitably end up in local landfills.
| Trap Feature | DIY Plastic Bottle Trap | Commercial Brand Trap |
|---|---|---|
| Initial Cost per Unit | Under $0.50 | $15 to $25 |
| Bait Customization | High (Seasonal recipes) | Low (Pre-packaged lures) |
| Environmental Impact | Recycles existing waste | Generates new plastic waste |
A direct comparison of homemade vs. commercial wasp traps reveals extreme savings. You control exactly what goes into a DIY hornet trap. If you notice honeybees getting caught accidentally, you can instantly alter the recipe. Commercial chemical lures simply do not offer this flexibility. Because they are so cheap, you can hang ten DIY traps for the exact price of one commercial unit.
When to Call a Professional for Wasp Infestations
Recognizing when a nest poses a severe hazard ensures you do not trigger a dangerous swarm trying to fix it yourself. Knowing your DIY limits keeps your family safe.
Dealing with wasp infestations at home requires honest assessment. A single trap setup works wonders for foraging workers passing through your yard. However, it will not eliminate a massive underground yellowjacket nest. If you spot a papery nest larger than a baseball attached to your eaves, step back immediately.
Watch for constant, heavy flight lines. If hundreds of insects are flying into a single crack in your siding, you have a structural infestation. Never spray water into a wall cavity. Do not attempt to seal the hole with foam, as the insects will simply chew through your interior drywall to escape into your living room. . At this point, you must hire a licensed exterminator. Professional pest control offers specialized protective gear and targeted treatments. You can continue using alternative methods for wasp deterrence safely around the yard while the pros handle the core nest removal.
Common Questions About Making a Wasp Trap: DIY Plastic Bottle Guide
What is the most effective wasp trap recipe?
The most effective wasp trap recipe changes entirely with the calendar. Use raw meat in the spring for protein, and switch to sugary fruit juice mixed with a few drops of dish soap in late summer. This aligns perfectly with their shifting seasonal cravings.
How to catch wasps at home safely?
How to catch wasps at home safely requires hanging your traps at least 20 feet away from human activity. Suspend them three to ten feet high to intercept flight paths. This safely draws the aggressive insects away from your patio.
Do wasp catchers homemade designs actually work?
Yes, wasp catchers homemade designs are incredibly successful. They exploit the insect’s natural inability to fly vertically out of an inverted funnel. When combined with dish soap to break surface tension, they drown pests rapidly.
What are the best DIY wasp traps for late summer?
The best DIY wasp traps for August and September utilize a two-liter clear soda bottle filled with 5 to 7 spoons of sugar per liter of water. Adding a splash of apple cider vinegar keeps beneficial honeybees safe.
Are homemade wasp trap ideas safe for pets?
Homemade wasp trap ideas are much safer than chemical aerosols, provided they are hung high out of reach. Simply ensure your dog or cat cannot jump to reach the hanging twine and knock the sugary liquid down.