That faint, rustling sound you hear from behind the living room wall isn’t the house settling. It’s the sound of thousands of tiny mouths chewing through your home’s structural integrity, a silent demolition crew causing over $5 billion in property damage annually in the United States. When you’re facing a hidden invasion, a targeted termite foam treatment is your most powerful weapon for reclaiming your peace of mind and protecting your investment.
How do you treat termites behind drywall?
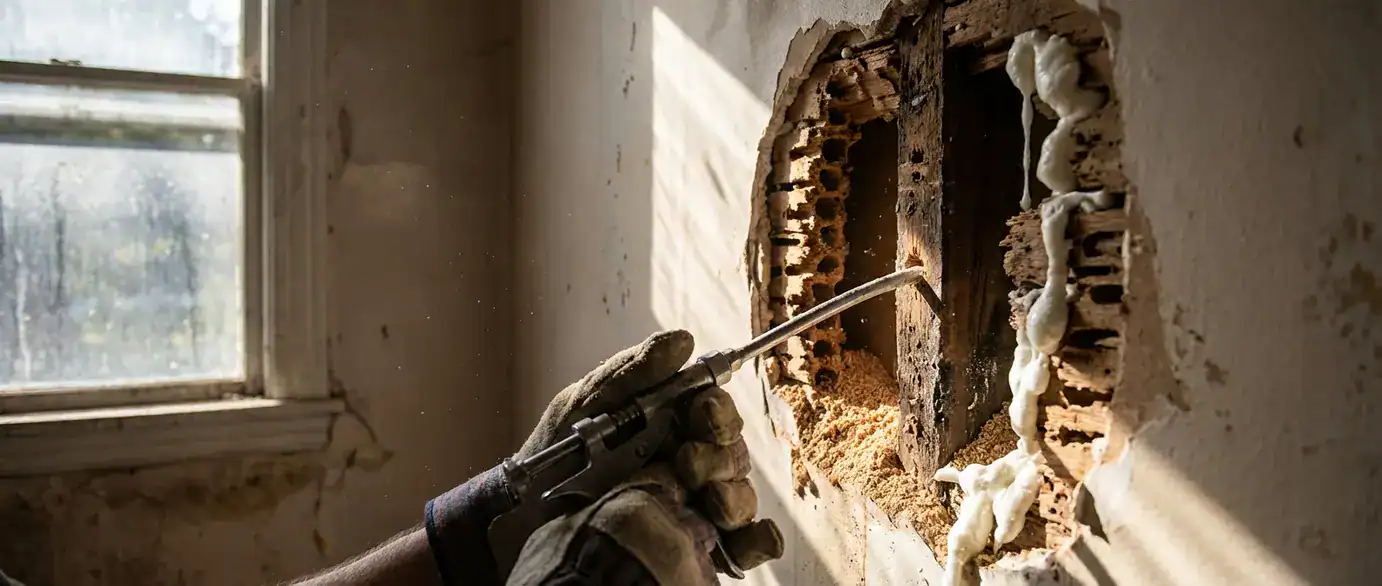
The most effective method for treating termites behind drywall is to drill small, 1/2-inch holes into the wall voids and inject a non-repellent, expanding termiticide foam. This foam expands to fill the cavity, coating termite galleries and killing the insects on contact, with colony elimination typically occurring within 3-5 days.
Decoding the Threat: Understanding Termite Infestations in Walls
Before you can effectively fight them, you need to understand your enemy. Termites are not a single entity; they are a complex society of pests, and the type you’re dealing with dictates the best course of action for any in-wall termite treatment. The two primary culprits you’ll find feasting on your home are Subterranean and Drywood termites.
Subterranean Termites: The Moisture-Driven Invaders
Subterranean termites are the most common and destructive type in North America. They build their colonies underground in the soil because they require constant moisture to survive. From this subterranean base, they construct elaborate mud tubes-pencil-sized tunnels made of soil, wood, and saliva-to travel above ground and access the cellulose in your home’s wooden framework.
Key Signs of Subterranean Termites:
- Mud Tubes: Look for these protective tunnels along your foundation, in crawl spaces, and climbing up walls. This is one of the clearest signs of termites in walls.
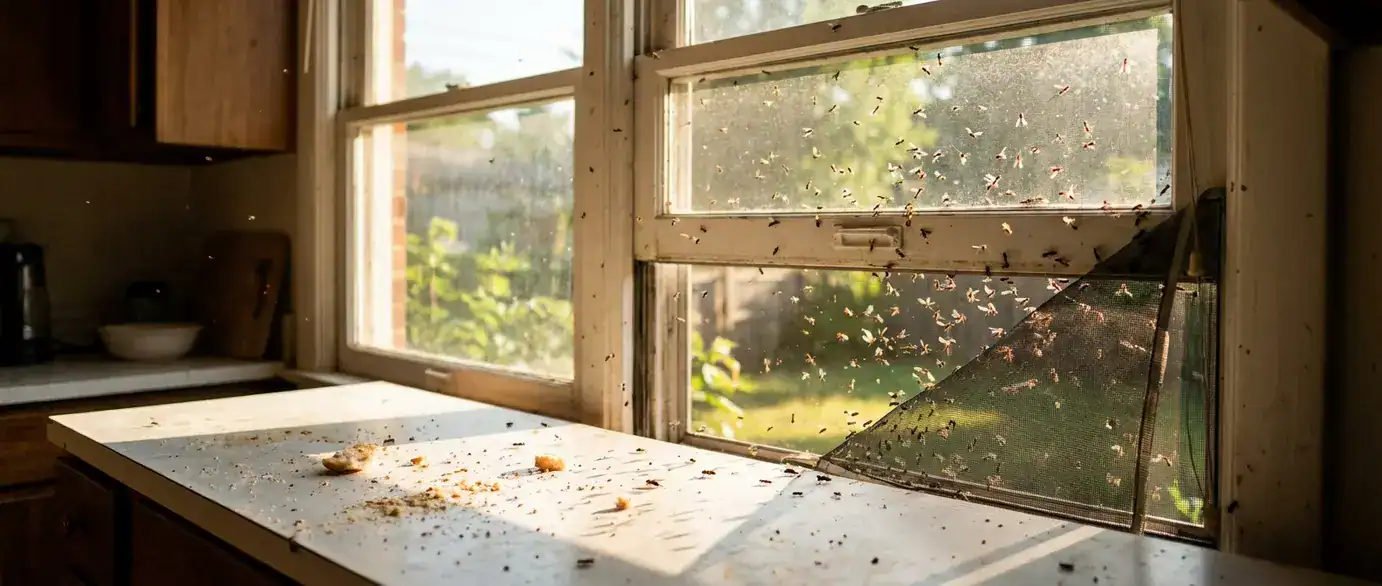
- Swarmers: In the spring, you might see swarms of winged termites (alates) emerging to start new colonies. Finding discarded wings on windowsills is a major red flag.
- Damaged Wood: Wood damaged by subterranean termites has a distinct layered or “honeycombed” appearance, as they eat along the grain.
Drywood Termites: The Airborne Colonizers
Unlike their subterranean cousins, drywood termites don’t need contact with soil. They can fly directly to your home, find a crack in the wood, and start a colony right there-often in attics, window frames, and, of course, behind your drywall. Because they live entirely within the wood they infest, they can be much harder to detect.
Key Signs of Drywood Termites:
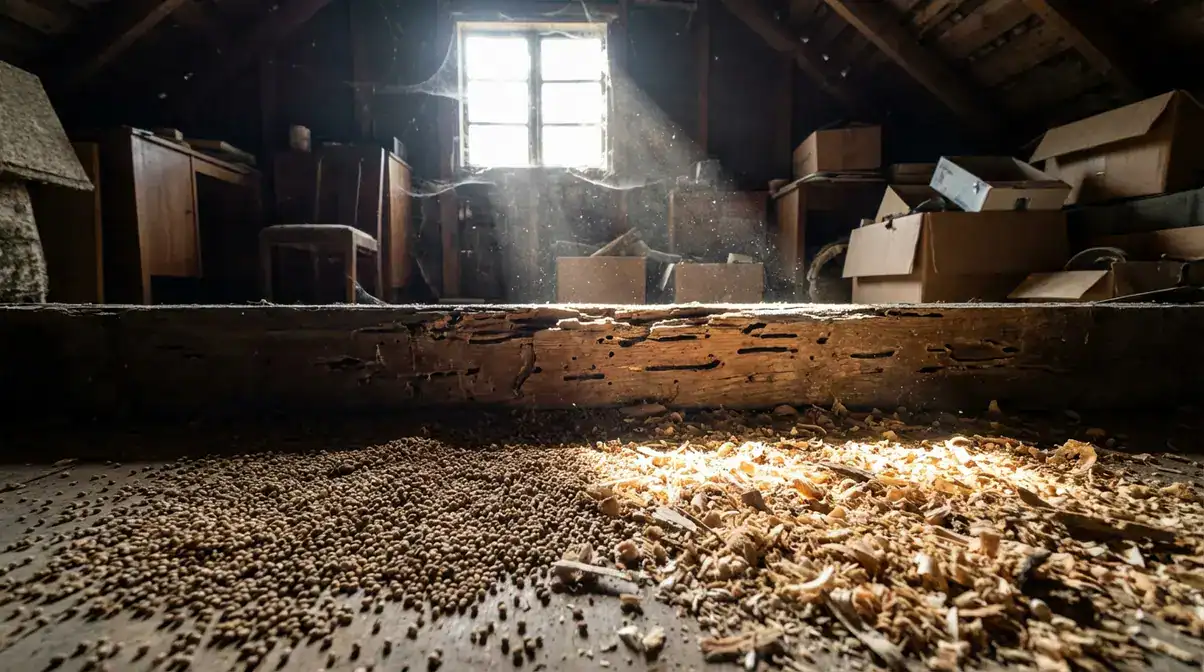
- Frass (Termite Droppings): Drywood termites push their fecal pellets out of small “kick-out” holes. This frass looks like tiny, six-sided grains of sand or sawdust and accumulates in small piles.
- Blistered or Darkened Wood: An infestation can cause the surface of the wood or drywall to appear bubbled, blistered, or darker.
- Hollow-Sounding Wood: Tapping on drywall or wood trim may produce a hollow or papery sound where termites have eaten the material from the inside out.
The Power of Foam: Why It’s the Superior Choice for Wall Voids
When termites are hidden behind drywall, simply spraying the surface is useless. Liquid treatments can be messy and may not reach the heart of the colony. This is where foam-based termite solutions excel. Termite treatment foam spray is specifically designed for these hard-to-reach areas.
The magic of foam insecticide for termites lies in its expansion ratio. A small amount of liquid product is mixed with a foaming agent and air, expanding to 20 to 40 times its original volume. For instance, a product like Alpine Ant & Termite Foam has a 35:1 expansion ratio. This allows the termiticide to travel up, down, and around obstacles within the wall void, coating studs, insulation, and the back of the drywall.
Key Advantages of Foaming Wall Voids:
- Superior Coverage: The foam expands to fill the entire cavity, ensuring no termite gallery is left untouched. It can reach 10-15 feet into voids from a single injection point.
- Long-Lasting Residual: High-quality foams leave behind a non-repellent residue that can last for 6-12 months. Termites don’t detect it, so they continue to pass through the treated area, picking up the poison and transferring it to others in the colony.
- Targeted Application: It allows for precise treatment of infested areas with minimal disruption, avoiding the need for extensive drywall removal.
- Fast-Acting: Most foam treatments kill termites on contact, with studies showing colony elimination in as little as 3 to 5 days. This provides a much quicker resolution than slower-acting bait systems.
The Arsenal: Best Termite Foam Products on the Market
Choosing the right product is crucial for a successful treatment. Not all foams are created equal. Here are some of the top-rated and most effective residential termite treatment techniques using foam, trusted by both professionals and savvy DIYers.
Termidor Foam (Fipronil)
- Overview: Often considered the gold standard, Termidor Foam contains Fipronil, a powerful non-repellent active ingredient. Termites that contact the foam transfer the poison to the rest of the colony before they die, creating a cascade effect.
- Rating: 9.8/10
- Key Features: Utilizes the patented “Transfer Effect” for complete colony elimination. It has a low-expansion formula that is ideal for targeted applications without excessive mess.
- Pros: Extremely effective, long residual life, trusted brand name.
- Cons: Higher price point, typically ranging from $35 to $65 per can.
- Verdict: The best choice for severe infestations where complete colony kill is the top priority.
PT® Alpine® Ant & Termite Foam (Dinotefuran)
- Overview: A reduced-risk, non-repellent foam that is highly effective against termites and ants. Its active ingredient, Dinotefuran, is known for its fast action.
- Rating: 9.2/10
- Key Features: Boasts a high expansion ratio (approximately 35:1), making it excellent for filling large voids. It dries as a clear, undetectable residue.
- Pros: Dries clear, low odor, effective on multiple pests.
- Cons: The residual effect may be slightly shorter than Fipronil-based products.
- Verdict: An excellent, eco-conscious option for homeowners concerned about harsh chemicals, especially for treating smaller or localized infestations.
Spectracide Terminate Termite Killing Foam (Prallethrin)
- Overview: A widely available and budget-friendly option for DIY termite foam applications. It’s designed for spot treatments and killing termites on contact.
- Rating: 7.5/10
- Key Features: Comes with an applicator straw for injecting into cracks, crevices, and wall voids. It’s readily available at major home improvement stores.
- Pros: Very affordable (around $10-$15 per can), easy to find, kills on contact.
- Cons: It’s a repellent insecticide, meaning termites may avoid treated areas, potentially sealing the colony deeper inside your walls. Less effective for total colony elimination.
- Verdict: Best used for very small, localized activity or as a temporary stop-gap measure while awaiting a more comprehensive treatment.
| Product | Active Ingredient | Expansion Ratio | Average Cost (20 oz can) |
| Termidor Foam | Fipronil (Non-Repellent) | Low (Approx. 20:1) | $35 – $65 |
| PT® Alpine® Foam | Dinotefuran (Non-Repellent) | High (Approx. 35:1) | $25 – $40 |
| FUSE Foam | Fipronil & Imidacloprid (Non-Repellent) | High (Approx. 30:1) | $20 – $25 |
| Spectracide Terminate Foam | Prallethrin (Repellent) | Medium (Approx. 25:1) | $10 – $15 |
The Battle Plan: A Step-by-Step Guide to Applying Termite Foam
Knowing how do you apply foam for termite treatment correctly is the difference between success and failure. Follow this detailed guide for a safe and effective drywall termite treatment.
Step 1: Gather Your Tools and Safety Gear
Before you begin, assemble everything you need. Safety is non-negotiable when handling any pesticide foam for termites.
Essential Tools & Materials:
- Drill with a 1/2-inch bit
- Your chosen termite foam product (e.g., Termidor Foam)
- Spackle or drywall patch kit
- Stud finder
- Optional: A cheap USB endoscope camera ($30-$50 online) to inspect inside the walls
Mandatory Safety Gear (PPE):
- Chemical-resistant gloves
- Safety goggles or glasses
- Long-sleeved shirt and pants
- A respirator mask, especially if working in a poorly ventilated area
Step 2: Pinpoint the Infestation and Plan Your Attack
Use your stud finder to locate the wall studs in the infested area. Termites often build their galleries alongside these wooden supports. Your goal is to inject foam into each void between the studs where activity is suspected. If you invested in an endoscope, drill one small exploratory hole and insert the camera to confirm the presence of termites, galleries, or damage before proceeding. This avoids unnecessary drilling.
Step 3: Drill the Injection Holes
Once you’ve mapped out the area, it’s time for the drilling holes for termite foam application.
- Drill a 1/2-inch hole directly into the drywall, about 18-24 inches above the floor.
- Continue drilling additional holes in a grid pattern. The standard recommendation is one hole every 12-16 inches horizontally (to treat each stud bay) and vertically along the same stud if you suspect activity runs up the wall.
- Vacuum any drywall dust from the holes and surrounding area to ensure a clean application.
Step 4: Inject the Termite Extermination Foam
Read the product label carefully before you begin. Shake the can vigorously for the time specified.
- Insert the applicator tube firmly into the hole you drilled.
- Press the actuator to inject the foam. A good rule of thumb is to spray for 5-10 seconds per hole, or until you feel a slight back-pressure. This indicates the void is filling. The foam will expand to fill the space.
- Work your way methodically across your grid, treating each hole. Be careful not to overfill, as excess foam can sometimes push through electrical outlets or other small openings.
- Wipe away any excess foam that seeps out with a damp cloth before it dries.
Step 5: Seal, Monitor, and Maintain
After the treatment is complete, the job isn’t quite done.
- Allow the foam to fully expand and settle, which can take several hours.
- Patch the drill holes using spackle or a drywall repair kit. Once dry, sand it smooth and touch it up with paint.
- Monitor the area closely for the next few weeks and months for any new signs of termite activity. Because of the long-term effectiveness of foam treatments, you should be protected, but vigilance is key.
DIY vs. Professional: A Cost and Risk Analysis
One of the biggest questions homeowners face is whether to tackle termite treatment themselves or hire a professional. Let’s break down the cost of termite foam treatment and the associated risks.
The DIY Approach
- Pros: The most significant advantage is cost. A DIY treatment using a few cans of high-quality foam like Termidor or FUSE might cost between $50 and $200. You also have control over the timing and process.
- Cons: The biggest risk is incomplete treatment. If you miss a hidden nest or fail to saturate all infested areas, the termites will simply regroup and continue their destruction, potentially leading to thousands in structural repairs. There are also health concerns regarding chemical treatments if PPE is not used correctly. As noted in online forums, some users report headaches from fipronil vapors in poorly ventilated spaces.
The Professional Service
- Pros: Professionals have the training, experience, and specialized equipment (like the $700 B&G VersaFoamer) to do the job right. They can accurately identify the termite species, locate all infestation points, and offer a warranty or guarantee for their work.
- Cons: Cost is the main drawback. Professional termite treatment costs for a targeted foam application can range from $500 to over $2,000, depending on the extent of the infestation. Some homeowners also express concern over the high markup, with Reddit debates pointing out that pros may charge $1,500 to inject $50 worth of product.
Verdict: For a very small, clearly localized infestation (e.g., around a single window frame), a DIY approach can be effective and save you money. However, for widespread or severe termite infestations in walls, the expertise and guarantee of a professional are well worth the investment to prevent catastrophic damage.
Long-Term Prevention and Maintenance
A successful termite prevention foam treatment is a major victory, but your work isn’t over. Protecting your home is an ongoing process.
- Control Moisture: Termites are attracted to moisture. Fix any leaky pipes, ensure gutters and downspouts direct water away from your foundation, and improve ventilation in crawl spaces.
- Eliminate Wood-to-Ground Contact: Remove any firewood, lumber, or cellulose debris from against your foundation. Ensure there is at least a 6-inch gap between soil and any wood siding.
- Schedule Regular Inspections: Have your home professionally inspected for termites at least once a year. An expert can spot the subtle signs of a new infestation before it becomes a major problem.
- Consider a Hybrid Approach: After a successful foam treatment for an active infestation, consider installing a professional baiting system around your home’s perimeter for long-term monitoring and prevention.
Common Questions About Foaming Wall Voids: How to Treat Termites Behind Drywall
How effective is foam treatment for termites?
Foam treatment is highly effective, with success rates reported between 85-95% for wall void applications when done correctly. Its effectiveness comes from its ability to expand and fill hidden cavities, directly contacting termites and leaving a long-lasting, non-repellent residual poison that spreads through the colony.
Is foam better than liquid for termite treatment?
For treating active infestations inside wall voids, foam is superior to liquid. Foam expands to ensure complete coverage in an enclosed space. Liquid treatments are better suited for creating a protective barrier in the soil around your home’s foundation, a different but equally important termite control method.
What are the signs of termites in walls?
Key signs include faint rustling or clicking sounds, pinpoint holes in the drywall, bubbling or peeling paint, hollow-sounding wood, and visible mud tubes climbing up from the foundation. For drywood termites, you may find small piles of sawdust-like frass near the walls.
How long does termite foam treatment last?
The residual effect of a quality non-repellent termite foam can last for 6 to 12 months inside a protected wall void. This long-term effectiveness ensures that any termites who survived the initial application or hatch later will still be eliminated when they contact the treated surfaces.
Can termite foam damage drywall or insulation?
When applied correctly, termite foam will not damage drywall. The foam is primarily water-based and designed to dissipate, leaving behind a dry residue. However, excessive application could potentially lead to moisture issues with certain types of insulation, which is why it’s important to follow the product’s application instructions carefully.
References & Expert Sources
- Polyguard Products, Inc. – TERM Termite Barrier System
- DIY Pest Control – Termite Control Products and Guides
- DoMyOwn.com – Termite Foam and Control Solutions
- U.S. Environmental Protection Agency (EPA) – Termite Control Information
- University of Kentucky Entomology – Termite Control: Answers for Homeowners
- Reddit – r/pestcontrol Community Forum
- Reddit – r/HomeImprovement Community Forum
Final Thoughts
Discovering a termite infestation behind your drywall can be incredibly stressful, but it’s a battle you can win. With the right knowledge and tools, a targeted termite foam treatment provides a powerful and precise solution to eliminate these hidden destroyers right where they live. Whether you opt for a DIY approach for a small problem or call in a professional for a larger invasion, the key is to act quickly and decisively. By foaming wall voids, you’re not just killing pests-you’re actively defending the structural integrity and value of your home for years to come.